Carol, How does this read with the photos stripped out?:(this is an evolving document, I distribute it freely but ask for an energy exchange in the form of feedback and suggestions  )Section 2 . Normal Breathing
Breathing is fundamental to life and health and yet most people do not breathe correctly. If you watch a small child breathe, or someone who is asleep, you will observe steady and continual breathing from the abdomen. Watch most people when they
are awake and they will likely breath from their chest. Breathing from the abdomen produces the correct energy flow in the body, it is the natural way of breathing and is stress free. Breathing from the chest is utilised during the "fight, flight and fright" response, during which time the body is put on a high state of alert, adrenalin is produced and the body is put into a state of stress.
One of the commonest reasons for poor breathing is poor posture. If you slump forward then pressure is placed on your diaphragm and it is easier to breathe from your chest. Sitting straight is a good fist step to correct breathing. Sitting in a meditation posture with a straight spine will highlight just how 'alien' abdomen breathing can seem to someone who has developed their chest breathing
over a number of years.
Another way to introduce stress into the body is to pause between exhalation and inhalation, as again many people do. Breathing should be continuous, with no pauses between the in-breath and the out-breath.
Exercise 1. Relaxed normal breathingIn a relaxed posture, either sitting with your spine straight or, preferably, laying down, practice normal breathing. Place a hand on your abdomen and watch it rise and fall as you breathe. This is the essence of the Buddhist meditation practice called ana-pani-sati, simply observing your breath; there are 4 stages to observe; the out-breath, the end of the out-breath, the in-breath and the end of the in-breath. All breathing should ideally be done through the nose.
Exercise 2. The full yogic breathA full yogic breath utilises your full lung capacity and includes abdominal and chest breathing. This is best practiced in a laying position, but a comfortable sitting posture can be adopted if preferred. The first stage is to completely expand your abdomen during inhalation, breathing through the nostrils. Then expand your chest as you keep filling your lungs with air. The last stage is then to
imagine filling the area between your chest and shoulders with air, but it is very important not to raise your shoulders during this process, they should
remain relaxed during all types of breathing. The exhalation is the reverse of this process.
Section 3. Basic PranayamaThe purpose of pranayama is to produce a correct energy flow within your body. The yogis describe energy flowing through the body inside prana channels called nadis. There are approximately 72,000 of these channels recognized in yoga. For the purpose of this exercise only the 3 main channels are introduced.
The most important nadi is called the sushumna and it runs inside the spinal cord. It is usually closed in most people but can be opened with pranayama, working with the prana that flows in next two most important, the pingala and ida. These nadi terminate at the two nostrils and the flow of air through each of these nostrils serves as an ideal correspondent to the flow of prana through
the nadi.
One end of the ida channel is located at the left nostril, the other end on the left side of the base of the spine; the pingala nadi has the same terminals on the right side of the body.
Breathing through the left nostril is cooling and constructive; breathing through the right is warming and destructive. Breathing through both nostrils at the same time produces a quiet and calm mind, and in this state sushumna has a chance to be open.
The yogis claim that one minute of pranayama energizes the body for 1 hour, so 24 minutes of practice daily keeps the body fully energized: 12 minutes in the morning and 12 minutes in the evening should be your daily minimum.
Exercise 3. Basic Pranayama Swami Rama considers the breathing sequence shown in exercise 3 to be the best, but it may be a little too complicated for some people in the beginning. It is worth persevering with this exercise, but a simpler version is also given. In these exercises I=inhale, E=exhale, L=left nostril, R=right nostril and B=Both nostrils.
For this exercise a comfortable sitting position should be adopted, keeping the spine straight. Fold the first and second fingers of your right hand into the palm. The thumb and third finger are then placed on the nose, just below the bridge (bone) and only slight pressure is required to alternately close the nostrils.
Alternate the breathing pattern every 3 breaths. Start with: EL, IR, EL, IR, EL, IR now switch ER, IL, ER, IL, ER, IL, then switch IB, EB, IB, EB, IB, EB.
These 9 breaths constitute one round. Keep repeating this pattern for 5 minutes every day, gradually increasing to 20 minutes each day (e.g., three more minutes every three days). Once you have comfortably achieved 20 minutes then seek further guidance if you wish to increase your practice. To increase beyond this level can be dangerous as it is possible to start reprogramming your breathing
pattern, this is not something you want to do!
Exercise 3A. Simple PranayamaA simpler sequence, perhaps more suitable for beginners, is IL, EL, IR, ER, IL, EL, IR, ER, IL, EL, IR, ER, IB, EB, IB, EB, IB, EB.
TIP: With both the above exercises it is easier to keep count using the fingers of your left hand. It is best to find your own way of doing this, but for example: Start with your left palm resting on your left knee, with fingers slightly raised. For the 3 breaths then
touch your little finger, ring finger then middle finger down on your knee. Then switch the breath. Then the index finger, thumb and lift all your fingers for the next 3 breaths. Then remember to breathe 3 times through both nostrils while your fingers are raised, then start again. This way the left part of your hand signals leading with your left nostril and the right part of your hand signals breathing with your right nostril, fingers in the air is a signal to breathe through both nostrils.
Exercise 4. More advanced pranayama: KapalbhatiAnother useful and simple technique of pranayama is Kapalbhati, or 'skull shining'. This method is good for increasing mental energy and can be practiced whenever you feel tired but still need to be mentally active or alert.
In a comfortable sitting position with spine straight, exhale sharply through both nostrils. This exhalation is produced by an intake of the abdomen (not the chest). Then relax the abdominal muscles completely, but do not inhale actively, the abdomen will relax and expand naturally. To begin, master the technique with a slow breathing rate, 1 exhale every 1 or 2 seconds. Repeat 20 times. As the passive inhalation is mastered then increase the breathing rate to 2 breaths per second and increase the duration to 50 breaths. Finally
increase to 3 or 4 exhalations per second and 100 breaths.
Until you have finally mastered the technique you will be exhaling more air than you inhale, and after a few breaths your rhythm will be interrupted as a fuller (active) inhalation is required. With practice this tendency to run out of breath will diminish.
Last edited by lerrocco on Sun Apr 18, 2010 1:01 am; edited 1 time in total (Reason for editing : formatting)






.jpg)



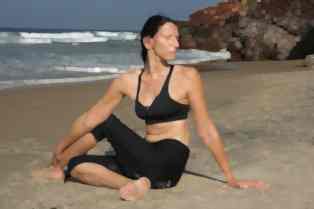


 ). The word missing from the above quote is 'abdominal', we MUST breathe from our bellies. Sat at a computer (or a microscope - I was 8 hours at mine today) we slump forward, putting pressure on our diaphragm and switching the breathing to the chest - this induces the fear fight flight response and is terrible for our health, messes up our body chemistry completely. So someting as simple as sitting upright can be so beneficial for health.


